
Table of Contents
It’s hard to be stuck in an impending zombie apocalypse without some essentials on hand. If you have come to your senses and decided to take up prepping, consider the following when stocking up on supplies.
Emergency Kit or Bug-Out Bag (BUB)
Bug-Out Bags (B.O.B) or Emergency Escape Bags are always a pretty hotly debated subject among survivalists. The first good reason for this is that you get the option of putting exactly what you want in it. The second reason is that when it comes to an emergency situation, you’ll know exactly what you have, how much and where it is inside your bag. That means that you won’t be searching around in the dark trying to work out where things are; you’ll know what part of the bag it’s in and how many of them you have.
If you’re new to being a Survivalist, then creating your first B.O.B can seem like a massive undertaking and quite complicated. But, once you break it down it’s really just a matter of going through your checklist and ensuring you have exactly what you need, without becoming overloaded. You might not be able to have everything you will ever need in your B.O.B, but you’ll definitely be a lot more prepared than someone who has done nothing.
Most people spend years building their personal B.O.Bs. They constantly get their equipment out and swap it out for new and improved gear as it becomes available. The ultimate aim for your B.O.B is to keep you going and get you far enough away from danger. Obviously, you won’t be able to live off your B.O.B forever, but you should have enough supplies and equipment inside to last you 72 hours. Start at sustaining yourself for a minimum of 3 days, then tweak it. See what you could do without and perhaps what extra items you could include.
You have to consider that you may not be able to get out with a vehicle, so plan on carrying your B.O.B and work out what you’re comfortable with. Another thing to consider is whether you will be alone or have friends and family members with you. Everyone should be responsible for carrying their own B.O.B unless they are a small child or perhaps unwell.
Let’s start with seven of the main types of equipment that you’ll need in your B.O.B, and then move on from there.
Water
This is probably one of the main things that you will need to have inside your B.O.B; it’s also heavy and takes up a lot of room. 1 liter of water per person, per day, is recommended as the absolute minimum. Your B.O.B should contain at least 3 liters of water if you plan on lasting 72 hours. You can boil water to keep it purified and use iodine tablets, or you can look at purchasing a decent water filtration system.
Food
For the food situation, there is a wide variety of backpack meals, MRE’s, and energy bars to get you through the first critical 72 hours. They are extremely light, take up little space, and will last a long time. In the end, you will need to find a more permanent solution to your food needs, but for those first few days, these meals will get you out of trouble.
Clothes
You should pack enough clothes to last you at least three days. Obviously, in the middle of a zombie apocalypse, you aren’t worried about fashion; it’s practicality that matters. Pack clothes suitable for both warm and cold weather. You’ll need a good pair of hiking/walking boots, a good pair of long pants, two pairs of good quality socks, two shirts (long & short sleeve), a waterproof jacket, thermal pants & top, a hat, and a bandana.
Shelter
It doesn’t matter if you have a vehicle or a place you plan on bugging out to, you should include an alternative form of shelter in your B.O.B. A high-quality all-weather sleeping bag, bedroll, or swag would be ideal. Try to consider the weight of whatever you may have to carry.
First Aid Kit
Most experts recommend that you build your first aid kit instead of buying one. They all claim to have everything you need and they just might do, but what’s the point of having a snake bite kit if there are no snakes?
It also means that they may have left out extra bandages to pack something else.
If you build your first aid kit, you’ll know exactly what’s in it and where it is. Make sure that you keep your kit in a secure, safe, and dry container, it could just save your life or a loved one’s. Toolboxes and fishing tackle boxes make excellent storage containers for your first aid kit. It should contain roll bandages, gauze pads, medical tape, tweezers, scissors, alcohol wipes, aspirin, gloves, bandages, sanitizer, face masks, a medical guide, needles and thread, and any other item you could think of. If you could take basic first aid courses and CPR, then this would be a huge benefit to you and your family. Also, consider putting a compact medical book inside your first aid kit.
Basic Equipment
This is where we will cover all of the miscellaneous items that don’t need a category by themselves but are important nonetheless.
Obviously, you can’t carry everything with you, so it will be up to personal preference what makes the final cut to your B.O.B. First, you’ll need rain equipment, as it’s extremely important to keep yourself dry to prevent illness.
Have you ever tried to start a fire with a rock in the rain? Sounds pretty damn rough. You’ll want to include strike-anywhere matches, a butane lighter, and ordinary matches. Something that might seem obvious at the time, when you’re sitting looking at a fire with food in the other hand and no pot, you’ll need a pan or pot to cook meals on and to boil water. Consider adding a small camping stove with its own fuel source that fits inside the pot you choose. You’ll also want two ultimate light sources. Small LED flashlights use little battery power so will last you quite a while and won’t take up much space. Consider spending a little bit more on your torch and getting a high-quality waterproof and shockproof model. Lastly, get a high-quality, multi-purpose survival knife.
Weapons
In a zombie apocalypse, you will need a weapon for protection against not only zombies but also against other people looking to take whatever you have. There will most likely be a complete breakdown of law and order, so your own protection is extremely important.
A pistol is probably one of the most versatile weapons that you could have in your B.O.B. It’s small, light, and you’ll be able to carry extra ammunition in magazines ready to go, depending on what sort of pistol you choose. You could choose to carry a rifle or also a shotgun. Whatever you choose will be more of a personal choice as each firearm will be good for different situations.
If you don’t want to use a firearm, there are some other good choices for you as well. You could choose a high-power slingshot with ball bearings. A crossbow or bow is also another good choice for hunting and defense. Bats, clubs, or knives are also good, especially if it’s a last-minute addition as you leave the house. Finally, if you like, you could choose to take a multi-purpose combat ax or hammer. These are ideal for close combat self-defense, as well as chopping wood, building defensive positions, and general duties.
Another extremely good idea to do is make a smaller pack with enough items to get you through approximately 12-24 hours. This way, if anything was to happen where you had to get out quickly, you could drop the main B.O.B but still have some equipment left over.
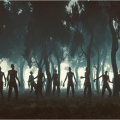
Preferred Zombie & Defense Weapons
When you are in a close-combat situation, there are more considerations than a normal melee-type situation. You have to consider fluids, bites, scratches, and finish it quickly and quietly before more zombies show up. The longer you continue the fight, the more chance you have of becoming contaminated or wounded.
All care should be taken to avoid close-quarters combat with zombies. If you can avoid fighting them all together, that’s even better. If there is the chance that you could slip away without a fight, that would be in your best interests. It isn’t worth the risk of contamination or becoming wounded if you don’t have to.
Killing the Walking Dead
Try to destroy the brain or sever the brain stem as quickly as possible in any fight. It looks easy but is surprisingly hard; humans have pretty damn hard heads and splitting them open isn’t as easy as it looks. Try to aim for the temple, neck, or back of the neck.
If you prefer, you can also slow down the zombie before trying to finish it off. Be aware that a slow zombie is still potentially dangerous, and only fools rush in. You can aim to sever legs at the knees or the spine to slow them down, giving you the opportunity to either finish them off or flee safely. Remember that the zombie is still capable of killing even when wounded, so you could be leaving it for someone else to deal with.
The Attributes of the Perfect Zombie Weapon
- It needs to be quick and kill cleanly.
- You want to stay as far away from the zombie as possible.
- The perfect zombie weapon will last a long time.
- Multifunctional weapons like battle axes or shovels that can be used for other purposes are even better.
- Little to no maintenance is preferable.
- The least amount of training. There probably won’t be schools during an apocalypse.
Melee or Close Combat Weapons
I’ll start with close-combat weapons or melee weapons. I’ll try to cover a few different things but remember that there are hundreds of different items that can be turned into effective melee weapons with little or no effort required. Melee weapons are perfect when it becomes a face-to-face fight, in any urban combat, or when you’re trying to maintain stealth and cover.
I’m not going to recommend any particular models of any of these weapons; I’ll leave that up to your own personal budget and preference. Remember, if you’re not the strongest, getting a hammer that weighs too much will become more of a hindrance than a help to you in any sort of prolonged fight-or-flight situation.
Baseball Bat
They will be easy to find and replace if damaged or lost. Very common, but not always the greatest when fighting zombies. Against a normal person, you will definitely be able to inflict some damage but remember zombies don’t feel pain. It could take a lot of force to bash in a zombie’s skull with a bat, but it may buy you extra time to make your escape.
Machete
Most small knives or bladed types of weapons will be almost useless in any sort of zombie fight. If you’re close enough to stab a zombie in the head or neck, you are already way too close for comfort. I would consider a knife as a last resort self-defense weapon. However, machetes or swords are different beasts altogether when it comes to killing zombies. It doesn’t take a lot of training to pick one up and efficiently kill or maim a zombie. You can also use it for the construction of defenses. There is a wide variety of different types of machetes available. Swords won’t be as easy to come by, and you have to make sure that it’s an actual fighting sword, not just a decorative display model that is poor quality and has no edge.
Hammers
They can be a deadly weapon when used to crush the skull of a zombie, but their limited reach is a major drawback. Another plus to hammers is that almost every home has one. You can get different weighted varieties with longer handles, but remember that the heavier it is, the less time you’ll be able to swing it effectively for.
Crowbar or Pinchbar
There are a lot of different varieties of crowbars available. You can choose a pretty standard one all the way to professional demolition models. They will be easy to come across and easy to replace if you have to leave it in a hurry. There are some titanium models available that will make them lighter than traditional steel and easier to swing around. Be careful of the reach of your crowbar, as you’ll have to get relatively close.
Hatchets / Axes / Multi-tools
Great for killing zombies, smashing skulls or severing spinal cords, an axe could be a deadly weapon in the right hands. Apart from the obvious uses it also makes a great tool for general use around your base or camp. You can use it to build defenses or smash your way into structures; simply put, everyone should have one.
DIY Zombie Weapons
Anything that you can make or construct to suit your own specifications is probably one of the best weapons that you could possess. If you make it out of commonly found materials it will be easily replaced in the event you either lose it or you have to abandon it. You could construct this to be assembled or disassembled and placed inside your B.O.B. Remember though, it won’t do you any good in an emergency if it’s inside your bag.
Firearms
There are thousands of different weapons to choose from, and everyone will have their own reasons for what they choose to use and why.
If you aren’t trained in how to properly maintain and use a firearm, they could be less helpful than you think. They require ammunition and the proper care and attention. You can’t just pick up a machine gun and start mowing down fields of zombies Rambo style without training.
Without adequate training, you could not only manage to shoot yourself or other people around you, but you could attract even more attention to yourself, bringing in more zombies or other people. There are many different types of silencers available on the market to suit almost every firearm, but unless you have your own they could be hard to come by.
Pistols
A short gun or pistol is probably the best option for self-defense. In a pinch, this will get you out of a jam, but this isn’t the movie and effectively shooting a zombie in the head isn’t as easy as they make it look. There isn’t a classic ‘hold the pistol sideways kill shot’ or magic trick that lets you get headshots one after another. You have to be able to shoot accurately, stay calm, count your shots, reload, and if all that fails get the hell out of there.
Rifles & Shotguns
There are several long guns available to choose from that each has their own advantages and disadvantages. Range, noise, and the speed of reloading all have to be taken into consideration. Maintenance and ammunition are also very important to consider. It’s not a lot of good if you have the perfect weapon, but it takes hard-to-find ammunition. Also, if you’re using automatic rifles or shotguns you have to pay close attention to their maintenance or they will be likely to break down and jam at the worst time.
Rifles give you an excellent range advantage over most conventional shotguns but also are harder to use in any sort of urban house environment.
A shotgun is probably one of the most effective ways to clear a path inside a house situation. They inflict a serious amount of damage depending on what ammunition you use in them.
You have to be aware of the noise you’re making and the unwanted attention that it will bring to you. Always maintain your weapons and be aware of your ammunition.
Crossbow or Other Bows
They look really cool and badass, but are they practical? To someone who has training or the time to train then they could be the best weapon you have. However, if you just pick one up, they won’t be much good to you unless you have natural abilities. Remember, if you shoot a zombie with an arrow, it will just keep coming unless you manage to pin it to something. The same rules apply, aim for the brain or brain stem to kill the zombie safely. Crossbows are relatively easy to maintain, depending on the model, and if you can collect the ammunition, you’ll never run out. They’re also silent, which makes them perfect for stealth kills and keeping out of close range.
Flash, Fire & Explosions
Burning, blowing up, and throwing acid on a zombie sounds pretty damn cool but not that practical. Flamethrowers seem great, but how many people have access to one and even then would know how to use the bloody thing? When you combine that with the fact that zombies don’t feel pain and you would then have to deal with flaming zombies, you would be in deep trouble. Zombies, just like people, take a long time to burn, and with them not being able to feel any pain you would most likely just burn yourself.
If you’re an explosives expert that has access to explosives, then they might make a great way to secure your perimeter. To the rest of us, they’ll probably end up blowing us into a million little pieces, if we can get them to work at all.
Unless you’re running around with buckets of acid, I don’t think it would be much use at all to anyone. Given enough acid and time I’m sure that you could dig a pit, fill it with acid, then sit around and watch zombies fall in it. Not really practical at all but as a last resort; actually, even then zombies don’t feel pain, so how long have you got before the acid does enough damage to kill it? Not long enough.
Fight or Flight
If you had to choose either, the flight is always the best option. Avoid contact with zombies or other people as much as possible and live to fight another day. If you have to fight, then fight as if your life depends on it – because it does.
I’m going to include a detailed checklist below of everything your B.O.B could include. This can be a great way to make sure that you have everything you need and will also help remind you of some other gear that you might not have considered.
B.O.B Equipment Checklist
Water
- Up To 72 Hours
- Containers
- Hydration Bladders
- Filtration Kit
Food
- Ration Packs / MRE’s
- Energy Bars
- Powder Energy Drinks
- Vitamins / Supplements
- Can Opener
- Cooking Pot / Pan
- Utensils
Clothes
- 1 Pair Long Pants
- 2 Long & Short Sleeve Shirts
- 2 Socks & Underwear
- Thermal Pants & Top
- Jacket
- Raincoat
- Sturdy and Comfortable Hiking Boots
- Hat
- Bandana
- Baklava
- Gloves
Shelter
- Tent
- Ground Tarp
- Sleeping Bag
- Swag
- Extra Thermal Blankets
First Aid Kit
- Antibiotics
- Gauze
- Bandages
- Gloves
- Tape
- Medication
- Headache Tablets
- Sterilizer
- Sling
- Tweezers
- Scalpel
- Super Glue
- Triangle Bandage
Basic Equipment
- Strike-Anywhere Matches
- Butane Lighters
- Camping Stove
- LED Flashlights
- Spare Batteries
- Map & Compass
- Duct Tape
- Signal Mirror
- Hygiene Kit
- Insect Repellent
- Para Cord or Rope
- Head Lamp
- Fishing Kit
- Dusk Masks
- Tools, Screwdrivers, Wrench, Hammer, Saw.
Weapons
- Pistol, Rifle or Shotgun
- Slingshot
- Crossbow
- Ammunition
- Spare Parts
- Knife
- Hammer
- Shovel
Filtration & Purification
It’s easy to take something that is available 24/7 for granted. Everywhere we go we can drink out of a tap, water fountain or just stop and buy a bottle of water. During a zombie apocalypse, the utilities would soon be non-existent. Without people to operate them, electricity, gas, water, and sewerage would soon shut down. This may continue to work slightly longer than the electricity or gas but once it turns off, you will lose sewage as well. Sewage could become backed up or flood, and then contaminate local water sources. Often, during floods, the water level rises and quickly makes any water contaminated.
At a minimum, we need at least a gallon of water per person per day, for drinking, hygiene, and food preparation. You could go into local areas and scavenge bottled water, but this exposes you to other dangers. Other people could be in the area looking for the same thing, and the more populated the area, the more zombies will be around. Depending on how long the emergency situation lasts, there won’t be bottled water around forever. It doesn’t matter if you settle down in one particular area or stay on the move, you’ll need to come up with a way to have safe drinking water.
On average, depending on the temperature and what sort of activity you’re up to, a person could last approximately three days without water. Once dehydration and malnutrition set in your chances of survival will be considerably lowered. Remember, it only takes 24 hours for the first signs of dehydration to set in.
The first thing that you’ll need to do is locate a source of water. Running water from a stream or river is ideal. If it’s a large body of water like a lake that isn’t too bad either. Small ponds or dams that contain stagnant or still water would probably be the last resort, but in the end, water is water. Having detailed maps with water sources is ideal. Spend some time planning your escape routes or travel routes. Knowing where you’re going and if there is water there will mean you’re already one step ahead.
Don’t wait a day until you’re already thirsty to start sorting out your water needs either. If you have 2 or 3 days’ water, then you have the perfect chance to get ahead and take care of your water needs for another couple of days. Being proactive means that if anything happens, zombies, other humans, or bad weather, you’ll have water in reserve.
The ideal way for you to store your water or transport would be in a strong, secure container such as a water bladder, metal water container, or plastic bottle/jug. If you don’t have these, you could fold a plastic sheet into the shape of a bag or line a bucket with it. Another handy way to carry water is inside a non-lubricated condom. They are light and take up very little space in your pack. Place the condom inside a sock or two socks and it will be even more secure.
Some canteens that you can purchase contain built-in screens that will prevent large particles from entering them. If you have a lot of heavy sediment in your water bottle, it will make the purification process harder, and in some cases simply ruin your filters. A cheap alternative to heavy sediment filters is coffee filters or a piece of cloth that you can keep folded away inside your pack. Your bandana is another handy piece of equipment for filtering out particles, or in a pinch, you can soak water into it and squeeze it out into a container. If you have to get water from a still source, then try to find somewhere where the sediment has settled.
The difference between water filtration and purification is purified water is safe to drink but may not look the most appetizing, and filtration is what occurs before and after the purification process. You try to filter out as much dirt, leaves, and crud as possible before you start the purification process. Once the water is purified it’s safe to drink, though it may look like mud. We are all used to crystal-clear water, so drinking something that looks like dirty muddy water with crap floating in it is hard for some people.
It isn’t a complicated process to filter your water and just achieving the basic amount of filtration is a relatively simple operation. As we mentioned above, a coffee filter or cloth folded over itself will remove a lot of the debris from your water. If you need to filter a lot of water for more than yourself or you plan on setting up a more permanent camp, then a more sophisticated filtration method will be needed.
If you want to purchase a filtration system from a manufacturer, then you will achieve an extremely high level of filtration depending on what you’re willing to spend. Some of the higher-quality filters will even filter out bacteria and most viruses.
Something else that you can consider is a personal filtration or purification straw. This is a relatively small and light item that can be carried on your person. You could include several of these into your B.O.B. Some of these straws filter anywhere from 75 liters all the way up to approximately 1,000 liters. Another variation of the straw system is a personal water bottle with a built-in filtering system. Some of these personal water bottles come with tap attachments for floods or other emergency situations. They work by just filling them up from the water source, screwing the cap on, and drinking through the mouthpiece.
Remember that not all filtration systems will filter out all possible contaminants, so careful attention needs to be paid to what is contaminating the water and what you could be dealing with.
Let’s move on to some different methods of purification now.
Boiling is probably one of the most well-known and easiest ways to accomplish methods of purification. It takes it above 100 C and above the virus or bacteria’s heat range. It doesn’t however remove harmful metals from water or dangerous chemicals that could be contaminating it.
The first step is gathering the water and running it through a simple filtration process to remove the larger debris from it. Build a fire, but remember that light and smoke may attract unwanted attention, so choose where and when you build your fire carefully. Bring a pot or metal container of water to the boil, leave it boiling for a few minutes and then let it cool.
Another possibility that you could consider, especially if you are set up in a position for a long amount of time, is distillation. The advantage of this method is it will also allow you to treat saltwater and make it safe to drink. The water is boiled, and the steam from this boiling water is collected and retained. You can also purchase hand crank distillation systems, electrical models, or solar models.
Next, let’s talk about chemical treatments that we can use to treat our water. Some of the more common chemicals used to treat water are iodine, sodium chlorite/chlorine dioxide, and Chlor-Floc. There are a couple of downsides to these methods. You have to be able to work out dosages of chemicals and the amount of water you are treating. Some parasites might not be killed using this method and tablets can become less effective because of damage or expired chemicals. I’ll talk briefly about each of the chemicals, and if you plan on using them, I recommend doing thorough research on them before use.
Iodine works by upsetting the ion balance within the cells of the bacteria, replacing the chemicals that the bacteria need to survive. Iodine over extended periods can become harmful to humans so it shouldn’t be used as a permanent solution, only a temporary one. Try not to use too much iodine in the water that you’re treating. Some systems that you purchase come with a measured container that you simply fill up, add the appropriate amount of iodine crystals or tablets too, and then shake. After you mix the iodine into your water container, it’s recommended that you allow the water to rest for a minimum of 30 minutes before you drink, allowing the chemicals to mix thoroughly.
Sodium chlorite or chlorine dioxide tablets work by using chlorination as the primary source for purification. Chlorination is widely used around the world to treat large amounts of water. It works by attacking the cell walls of the bacteria or virus and killing the organism. The tablets are relatively harmless to humans and come in foil-sealed packets that are light and easy to carry, providing a handy alternative to water systems. Follow the directions on the packet, adding it to your water, shaking, and allowing it to stand for several hours before drinking.
There are several sources that say that Chlor-Floc tablets aren’t as reliable as the other chemical means of purification. These should probably be used as a last resort if all other options have been exhausted. In an emergency, you could use regular household bleach or regular iodine from a medical cabinet.
If you think that rescue within a certain time is imminent, you could risk drinking untreated water. This would be a last resort if all other methods of purification were exhausted. Getting sick from a viral or bacterial infection and hoping you’re rescued before you become too ill is definitely not on my list of recommended activities.
Food Preparation & Storage
Preparing your Meals Ready to Eat or MRE’s can be quite useful in any sort of zombie apocalypse situation. It doesn’t just have to be for a zombie attack either; you could take them camping or for any sort of natural disaster. You can buy them premade, or you could make your own. The problem with the ones that are already made is that you don’t know what’s in them, and some of them taste like shit. You could experiment with these by adding herbs and spices, hot sauces, etc. until you’re happy, or you could just make your own.
One of the major problems you’ll face during a zombie apocalypse or any other type of natural disaster is a lack of food. It’s heavy, it’s bulky and it will eventually expire and be unfit to eat depending on how it’s stored.
There are certain things that you want to consider when you make your own MRE.
Try to choose ingredients that have a long shelf life. You can’t go wrong with any sort of freeze-dried food. The lighter, the better.
Remember, if you’re on foot or have to fit these in your B.O.B then you don’t want to be carrying around a lot of weight. You can choose to buy foods that are already dehydrated, or you can buy your own affordable dehydrator and do it yourself.
Just a little note here – you can get solar-powered dehydrators that could come in handy if you are going to be staying in one place for any particular length of time. You want to include foods that are high in calories. Even if you’re rationing your food this way, you will at least guarantee that you are getting the most energy possible. Try to make every MRE at least a minimum of 1,200 calories. This way if you’re camping, running, or just surviving you will be getting the maximum amount of energy.
Here are some good ideas based on standard military MRE’s:
- Breakfast: Powdered Eggs, Breakfast Bars or Dried Fruit and Nuts.
- Main Course / Entrée: Spaghetti, Beef Stews, Rice Dishes, Curries and Canned Tuna.
- Desserts: Rice Pudding, Fruit Cakes and Pound Cakes.
- Snacks / Side Dishes: Trail Mix, Dried Fruits, Jelly, Chocolate, Cookies, Mashed Potatoes, Candy, Breakfast Bars, Beef Jerky, Peanut Butter.
- Drinks: Gatorade, Powerade, Coffee, Tea, Cocoa, Shakes.
Try to avoid packing any sort of carbonated energy drinks. These are high in salt, sugar, and caffeine that will ultimately leave you drinking more water and becoming possibly dehydrated.
Remember that you will need to include some way to heat your MREs unless you fancy eating them cold. Sauces, salt & pepper, bouillon cubes, soup mixes, noodles, spoons, knives & forks, and plates, etc. are all essential items to include. You don’t have to put them in every MRE but include them in your bag.
Any sort of pre-packaged, canned items like chicken, beef, tuna, anchovies, spam, or instant oatmeal is great substitutes.
There are heaps of different ideas when it comes down to packaging your MRE. You are trying to aim for the least amount of packaging with the best chance of keeping your MREs protected from damage. You could use any sort of zip-type plastic bag or even better, vacuum seal them to remove air and prolong their shelf life even more.
Not all of these MREs will be instantly ready to eat, but with just a small amount of water most will be ready to go. If you pack tinned items, try and use only the cans that include a ring pull otherwise you will need to pack a can opener.


 I write bitchin’ kick-ass books about serious sh*t. My books are written for everyone in an easy to read and understandable style.